Part two of my first Home Assistant project should have been pretty easy. All I needed to do was switch out the light switch, I’ve done it in the past for wall sockets, shouldn’t be too difficult. Right? (Narrator: It was difficult.)
The Switch
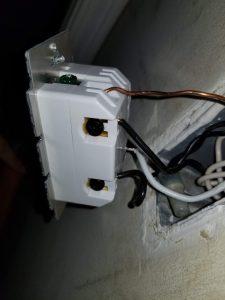
I ended up going with the GE Z-Wave Plus Smart Lighting Control Motion Sensor Switch. I wanted the motion sensor I already had set up, at the bottom of the stairs, to power the GE switch at the top. So the stairs would be lit when I walked up. First step was to remove the old switch, after turning the power off to that switch. Simple enough.
Old switch with the wires still connected. Now just pop those wires out and install the GE switch.
Houston? There’s a problem
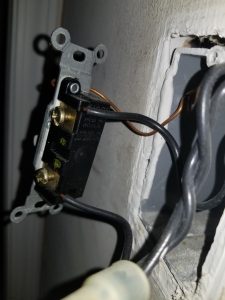
Good. Done. I turned the power back on and the switch worked! However, the other switches on the same circuit didn’t work. Which made 0 sense to me as someone who isn’t well versed in electrical things. So I called an electrician and he said he could come out in a few days. Which would be fine, but until then I took to the internet. Posted all the images I had to DYI StackOverFlow. I had one user ask me to splice in a lamp or something else before getting to the light switch. Might as well have asked me to do some heart surgery and divide by 0 while we’re at it. Someone else on a different board mentioned that my wire nuts were too small. Mostly looking at this photo
Amature Handyman
I used the electrical tape to make sure the wires didn’t move. I was told that’s a bad idea, you should be able to tug on the wire and have it not move. He suggested going up a wire nut size to fit all the wires. One stop at Lowe’s later and I found out he was right. Fixing the wire nut let the other lights on the circuit work again. Now if only I could stop my wife from saying “Maybe you need bigger nuts?” as a solution to every problem.
One thought on “First Home Assistant Project – Part 2: A Tale of Z-Wave Switches and Wire Nuts”